Monday, February 14, 2011

Bringing in the love with Red Velvet Cupcakes


Well what can I say. Love is in the air, its everywhere - Its in the over priced flowers and in the long wait times at restaurants on valentines. But that's the realist in me. The romantic in me of course wore RED to work, enjoyed a take out dinner and movie with my husband in the comfort of our home and finally tried my hand at the red velvet cake :)

When I first laid my eyes on this cake the color just shocked me enough to think that if it ain't brown it ain't no good. Of course that opinion was totally biased because of my love for chocolate. And then I tried it once at a friends place and kind of liked it. There is a light chocolate flavor to it...YIPPEE !!!!

This year I decided to be predictable and make something pink or red for the day, of course the first thing that came to my mind was that red velvet cake. Having browsed through endless recipes, the comments on the shocking amount of food color that goes into making this cake, and the opinions on cream cheese frosting versus regular whipped cream frosting, I decided to make cupcakes with a regular cream cheese frosting. I always have used regular frosting and wanted to try the cream cheese for a change.


Ended up that people were right. Its got a tang and requires a lot more sugar to make it sweet. I liked it but next time around I am going to stick to regular whipped cream frosting.

Ingredients: (makes about 10 cupcakes)

1 1/4cups all purpose flour
2 Tbs corn starch
1 Tbs cocoa powder
3/4 cup sugar
1/2 tsp baking soda
1/4 tsp salt
1/4 cup unsalted butter
1 egg
1/2 tsp vanilla extract
1/2 cup buttermilk
1 Tbs liquid red food coloring
1/2 tsp white distilled vinegar
 
Direction:

Preheat the oven to 350 degree and line a muffin pan with paper liner.
In a large bowl beat the egg, sugar and butter at room temperature with a hand blender. Once its creamy add salt, baking soda, vanilla extract, cocoa powder, corn starch and beat for a few seconds. Add the red food coloring and the mix well with a spatula. Be careful not to get the color on your counters or on yourself.

Once the color has been mixed well, add the flour and buttermilk in alternate batches and beat to mix well. Finally add the vinegar and beat for a few seconds scrapping down the sides of the bowl.

Fill the lined muffin pan with the cake batter adding a little more than half way through in each cup. I got enough batter to fill regular sized 10 cups. Place the pan in the oven and bake for about 20 minutes or until a toothpick through the center comes out clean. Top with frosting and serve.


Cream Cheese Frosting:

4 ounces cream cheese, room temperature
1 cup confectioners (powdered) sugar
2/3 cup heavy whipping cream
1/4 tsp vanilla extract

In a bowl beat the cream cheese until it is smooth. Add the vanilla extract and mix well. Now add 1/2 cup sugar and 1/3 heavy chipping cream and beat with a hand blender. Start at a low speed and increase the speed until the mixture thickens. you might need to add a little more sugar and/or cream to get the right consistency and sweetness. So be sure to check in between.

bon appetit !!!

Red Velvet Cupcakes With Cream Cheese Frosting on Foodista

Friday, February 4, 2011

Creamy Delight - Spaghetti in Carbonara sauce


Not sure if its the richness or its simplicity that attracts me more to Italian food. Either ways its always a pleasure to cook pasta. Carbonara is an Italian pasta dish that's usually cooked with egg, cheese, fatty pork and black pepper.
Since I am not fan of pork we modify by using some heavy cream.  I also added some mushrooms, peas and sauteed shrimp for added flavors and textures. It turned out to be a welcome break to my usual dinner and is most definitely here to stay :)


Ingredients:

Pasta Spaghetti - good for 2 people
Chopped Mushrooms - 1/2 cup
Green Peas - 1/2 cup
Shrimp - 1/2 cup
Garlic salt
Ground Pepper
Paprika (optional)
Eggs (beaten) - 2  (I used the egg whites and yolk of 1 egg)
Heavy Cream - 1/2 cup
Milk - 1/2 cup
Grated Parmesan cheese - 1 cup

Direction:

Bring water in a large pot to a roiling boil and add some salt to it. Drop the pasta in to cook to al dente - about 6-8 minutes. Once the pasta is cooked drain the liquid and set aside.
While the pasta gets cooked, heat the olive oil in a pan and add the mushrooms and shrimp and saute. Season it with garlic salt or some minced garlic and salt, paprika and freshly ground pepper
Add the green peas and continue to saute until the shrimp and mushrooms are cooked - about 5 to 7 minutes.
Add the cooked pasta to the pan and mix well. Reduce the heat to simmer and add the cream, eggs, 1/2 cup Parmesan cheese and milk to the pasta. Mix well to combine the sauce but be careful to not let it curdle.
Give it a minute or two and turn off the heat. Sprinkle some of the leftover cheese on top and serve.

Tips: top with fresh chopped parsley or crushed peanuts.

bon appetit !!!


Spaghetti Alla Carbonara


Wednesday, January 5, 2011

Gulab Jamun

Happy New Year everyone !!!
Here s hoping that my experiments in the kitchen get more interesting and challenging in the new year. I am starting my first post of the year on a sweet note from homeland - Gulab Jamun.


This is likely by far one of the most popular and common Indian desserts that's familiar to most people around the world. It finds its place in every wedding, festival and for those of us in the USA, in every Indian buffet. But its almost impossible to get bored of it. It is made of a dough consisting mainly of milk solids, rolled into a ball, deep fried and is then put into a flavored sugar syrup. Its best served warm and pairs fairly well with ice cream. 'Gulab' means rose and usually but not always the sugar syrup is flavored with rosewater and hence the name.

Since its a favorite dessert of ours and hubby dear has been badgering me to make these for a very long time now, I thought what better time to get down to it than New Years.
Pretty much all Indian stores sell the instant gulab jamun mix that you can use. Since my hubby isn't very fond of those and I for one love putting the ingredients together, decided to make it my own. There are variations in the kind of milk solids used to make the dough. I am making mine real simple and easy.


The below measurements makes about 20-25 jamuns depending on how small or big you roll them. You want to keep them small since they tend to almost double in volume once fried and dropped in the syrup.

Ingredients:

Milk powder - 1 cup
All purpose flour - 1/4 cup
Baking soda - 1/8 tsp
Milk - 1/2 cup (I used a little less than 1/2 cup)
Oil for deep frying
Butter or oil to grease your hands ( makes it easier to roll the dough)

For the syrup
Sugar - 1 1/2 cup
Water - 2 cups
Cardamom seeds - 3-4
Chopped pistachios for garnish
Coconut flakes for garnish

Directions:

Syrup
In a saucepan over medium heat add the sugar and water to make the syrup. Drop in the cardamom seeds to flavor the syrup. Bring it to a boil and then let it simmer, until it thickens slightly. When touched with your fingertips the syrup should feel sticky but be careful not to burn yourself. You could also add a little rosewater to the syrup if you like.

Jamuns
Mix the milk powder, flour and baking soda in a small bowl. Slowly add the milk to it to make a slightly sticky dough. The dough tends to dry faster, so keep them moist with milk. I first added about 1/4 cup milk and mixed it well and let the dough sit for about 2-3 minutes. It will absorb the milk by this time and tends to dry up a bit. Now add a little more milk, and try rolling the dough into small balls. If the balls don't turn out smooth without cracks then the dough is dry - Add more milk. Also be sure to grease your hands with some oil or butter to roll the dough.


Before you start to roll the dough heat some oil for deep frying. You don't want your oil too hot for this. When you drop the rolled balls it shouldn't immediately come up. If it does, then your oil is too hot and it will just burn the outside and the inside wouldn't be fully cooked. So do some test runs once the oil is heated. Somewhere between a low and medium setting worked for me.

Once the the dough has been rolled and your oil is ready, drop them 3-4 at a time depending on how big a pan you are using and deep fry the balls. Keep them moving in the oil so that they are evenly cooked. Once they turn a medium brown remove them and place on a liner to drain the oil. Wait for a couple of minutes and then drop the fried balls into the sugar syrup. Let them soak a while in the syrup before serving. Garnish with pistachios or coconut if you please and serve warm or cold.


Tip: Add some rosewater to the syrup for the flavor and aroma.


bon appetit !!!


Gulab Jamun

Tuesday, December 28, 2010

Spicy Indian Pancakes (Uttapam)


Breakfast - the most important meal of the day and one that also proves to be both interesting and frustrating for me. Its not because of the lack of options - trust me, there are way too many options for breakfast where I come from. I just don't fancy spending a lot of time in the kitchen in the mornings. The easy part though if you are making a south Indian breakfast is that since almost everything requires a  batter that can either be made a day before or can be bought from an Indian store. Most stores carry freshly made Dosa/Idli/Uttapam batter. You could also use the same batter to prepare all 3 dishes - the difference being the consistency of the batter.

Many of you would be more familiar with 'Dosa' which is a thin Indian crepe. 'Uttapam' is more like a big pancake and you can add an assortment of veggies to it that's cooked right in the batter. You use the same batter that is used to make Dosas, just don't thin it out too much. The batter needs to be runny but thick. 


For the Batter:

3 cups dosa/idli rice
1 cup urad dal (white split lentils)
salt to taste
water

Soak the rice and dal separately first thing in the morning. Grind the rice and dal into a smooth paste adding little water. Let the batter sit in a warm place to ferment. I would normally prepare the batter late in the evening and let it stand in a warm place over night. Once the batter is ready thin it out a little with water if it is too thick. You don't want it to be too thick or too thin. 


Uttapam:

1 small onion
3-4 green chili
coriander leaves
small piece of ginger
1 small tomato
red chili powder for garnish
vegetable or olive oil 

Finely chop all the veggies and mix them well in a bowl. Heat up a flat griddle on medium heat and dot it with some oil - a few drops spread around will do. Spoon a bid ladle of the batter on to the pan and spread it out a little. Be careful not to spread them too thin. While it cooks on one side, add the chopped veggies on top and add few drops of oil on top. Let it cook for a minute. If you lift the pancake up a little you will see that the underside has turned to a light brown. Carefully turn the pancake over and cook the side with the veggies - about another minute.

Transfer on to a plate, sprinkle with red chili powder and serve warm with coconut and/or tomato chutney.

Coconut Chutney:

1 cup shredded fresh coconut
2-3 curry leaves
2 green chili
less than a handful of channa dal (lentils) - optional
salt to taste

Grind all of the above adding very little water. You can add more water and have a smooth consistency or add little water to get a chunky thick chutney.


Tomato Chutney:

3 ripe tomatoes roughly chopped
1/2 red onion roughly chopped
2-3 red chillies
2 Tbs Urad dal (lentils)
3-4 whole black pepper
a pinch of cumin seeds
1/2 tsp tamarind paste
1 Tbs grated coconut - optional

Dry roast red chilies, lentils, black pepper, cumin seeds and set aside. Heat oil in a pan and saute the onions for about 2 minutes. Add the the tomatoes and tamarind to this cook for another 2 minutes. Turn off the heat and once the tomato mix is cooled a bit add them to a blender along with the roasted ingredients and grind into a smooth paste adding water as needed.


Note: Use any leftover batter to make Dosa or try another batch of the pancakes with different veggies.

bon appetit !!!

Wednesday, December 22, 2010

Pineapple Upside Down Cake


Having experimented with chocolate cakes, I was on a mission to find something different that satisfied my very picky palate. That's when I stumbled upon the pineapple upside down cake. It is simple enough to put together specially since there is no icing involved. It is best served warm and that makes it the perfect dessert for the winters and as it turns out for the dinner I had for a friend over the weekend.
The cake itself is very moist and the sweetness from the pineapple and the caramel kicked it up a notch. It has now found a place into one of my most favorite things to bake.


Topping:

4 tablespoons unsalted butter
3/4 cup light brown sugar
1 can pineapple slices

Place the butter and sugar in a saucepan over low heat until the butter is melted and the sugar is caramelized. This should take less than a minute else the topping will harden. Remove from heat and pour it into a 9 inch greased cake pan. Arrange the pineapple slices on top of the sugar mixture. I was able to fit in about 7 slices. I also cut a pineapple slice into smaller pieces to fill in the gaps in the center of the the slices and in between. I wanted as much pineapple as I could fit in here :)

Cake Batter:

3/4 cup all purpose flour
2 teaspoons baking powder
1/4 teaspoon salt
1/2 cup unsalted butter
1 cup sugar
1 tsp pure vanilla extract
2 large eggs, separated
1/4 cup milk
1/4 teaspoon cream of tartar

In a large bowl, with a hand mixer beat the butter and sugar until it is creamy. Now add the egg yolks and beat further until it is light and fluffy. Now add the baking powder, salt, vanilla extract and beat until its mixed. Alternately add the flour and milk to this mixture while beating at a medium speed.
In a separate bowl whisk together the egg whites and the cream of tartar. Add this to the above cake batter and beat well until mixed. The batter will look like liquid silk by now..atleast that's how it seemed to me - smooth and silky :)


Pour the cake batter over the the pineapple slices and spread them evenly. Bake in the preheated oven ( 350 degree F ) for about 40 - 45 minutes. Once the top of the cake has browned check the cake to see if a toothpick through the center comes out clean. If it does then remove from the oven and let it cool for about 10 minutes.
Place a serving plate over the cake and carefully invert the cake. Serve warm with whipped cream or ice cream.

Note: top with cherries for added colour

bon appetit !!!


Pineapple Upsidedown Cake

Friday, December 10, 2010

Coconut Macaroons


The day called for something tropical and I couldn't think of anything better to try than baking up a batch of coconut macaroons to munch on. I have been meaning to try them out since I always buy them from the bakery down the road. This time around I simply stuck with the directions behind the package. The directions were simple and the results were even better. You could also try dipping a few of them in chocolate.


Ingredients:

1 (14 ounce) package sweetened coconut flakes
2/3 cup sugar
6 Tbs flour
1/4 tsp salt
4 egg whites, slightly beaten
1 tsp almond extract

Directions:

Preheat the oven to 325 F. Mix the coconut, sugar, flour and salt in a bowl. Stir in the egg whites and almond extract until well blended. Drop about a tablespoon of the mixture on to a baking sheet lined with parchment paper. 
Bake for 20 minutes or until edges of cookies turn golden brown. Remove the baking sheet and cook completely before serving.

Tip: If you like chocolate, dip a few of the macaroons in thick melted chocolate and enjoy.

bon appetit !!!

Coconut Macaroons on FoodistaCoconut Macaroons

Thursday, December 9, 2010

Banana Oatmeal Cookies


I am back from a long break from blogging with a healthy breakfast snack. Spending a lot of my evenings and weekends working over the last 2 months, the last thing I needed was to sit in front of another laptop. Of course the long work hours did not keep me away from my kitchen though. Its one of those things that keeps me sane amid dealing with deadlines.

Breakfast is a meal that I find both interesting and boring. Boring for most part because it requires me to actually do something first thing in the morning instead of lazying around. That's why I am so fond of things that I can make the day before. I am not a big fan of oatmeal and definitely not when warm milk is involved. Since I had some bananas that were ripe and crying out to me to do something with them instead of letting them rot, I thought of trying out these cookies that I once saw on the allrecipes app.

They seemed simple and easy to put together and without any butter or sugar sounded healthy to me. They turned out pretty good and it isn't very sweet. You will notice that the only sweetness is from the bananas and the dates. So if you are somebody who absolutely needs a sugar rush then go ahead and add some. I prefer mine without any added sugar. You could also try adding some chopped nuts along with the dates.

These cookies do not keep well for long. So make smaller batches and be sure to refrigerate them once cooled.


Ingredients:

3 ripe bananas
2 cups oats
1 cup chopped dates
1/3 cup vegetable oil
1 tsp vanilla extract

Directions:

Preheat the oven to 350 degree F.
Mash the bananas in a bowl and add the other ingredients to it and mix well.
You could also add walnuts/almonds or anything else you like if you want some bite to these cookies. Line a cookie sheet with parchment paper and drop 12 scoops of the prepared mix on to the sheet. Shape the cookies to the size and shape you want, these will bake just as they are without spreading.

Bake the cookies for about 25 -30 minutes. At the 20 minute mark, watch them and once the tops turn slightly brown turn off the oven and remove the cookies. Let it cool for about 10 minutes.

Note: The above proportions makes about 12 good sized cookies.

bon appetit !!!

Monday, September 20, 2010

Penne in Pesto Sauce


On a much needed rainy day after a long hot gruelling summer all that I wanted to do was sit out, watch the rain and sip some wine. So pasta was my obvious choice for dinner - which reminded me of a pesto sauce that I have been wanting to try ever since my visit to Carabbas. Pesto comes from pestâ which means "to pound or to crush". It is for most part made by crushing basil leaves with garlic, salt and pine nuts. sun dried tomatoes are a nice addition to the pesto. 
Anyways for this time around I wanted something that was healthy, quick, easy to make and I was not in the mood to run to the store. I luckily had the basic things that was needed and it was a breeze to put this together. I was ready with my sauteed mushrooms and pesto sauce by the time the pasta was cooked. 


Ingredients:
2 cup - penne pasta
2 cups - fresh baby spinach leaves
1/8 cup and some - pine nuts
1/8 cup - walnuts
1 tsp dried basil (fresh basil works best)
1 Tbs butter
3 Tbs olive oil
garlic 
1 cup chopped mushrooms
salt 
fresh ground black pepper
red pepper flakes


Directions:
Cook the pasta as per the instructions on your pasta box. I normally some salt to the water and let it cook for about 10 minutes. Drain the cooked pasta and set aside.
While the pasta is cooking, saute the chopped mushrooms in 1 Tbs olive oil along with 1 clove of thinly sliced garlic, salt, and some red pepper flakes.
While that is going on add the washed spinach, basil, pine nuts, walnuts, 2 garlic cloves, salt, pepper, butter and 2 Tbs olive oil to a food processor or mixer and grind for a minute. the pesto should be thick but not smooth. 


Toss the pasta, pesto and mushrooms together and enjoy. Told you , it was a breeze :)


bon appetit !!!

Wednesday, September 15, 2010

Vegetarian Stir-fry


This is one of my most favorite things to prepare for a weeknight dinner, simply because it hardly takes any time and its yum - for those of you who run in the other direction even at the mention of 'tofu', well it doesn't hurt to try something different and maybe give the meat section a break. I have never been a big fan of tofu myself but off late I have developed a taste for it and mostly its restricted to this one recipe :)  
I like that it has very little flavor of its own so that I can season or marinate it to suit the dish without worrying too much. It being low in calories and high in protein earns a big plus on my chart. You want to be sure to use the "firm tofu", otherwise you are just going to be left with broken pieces and that's not very appetizing when it comes to stir fry. 


Ingredients:

firm tofu, cubed (about 15 pieces)
small onion -1 (cut to 1 inch pieces)
fresh ginger, sliced thin
fresh garlic, sliced thin
red and/or green peppers - quarter each if using both
green chillies - 2
cilantro
salt
red pepper flakes
soy sauce - 1/8 cup
stir-fry sauce - 1/8 cup
olive oil - 1Tbs

Directions:

Heat the oil in a pan or wok. Add the thinly sliced ginger and garlic and enjoy the aroma for a minute. Now add the onion and red/green peppers and the green chili and fry until the onions start to brown slightly. Add the soy and stir-fry sauce and mix well. You could try different sauces like sweet and sour, peanut sauce, oyster sauce or anything else that you have a fancy for. Add salt and some red pepper flakes for that extra kick. 

Watch the spice levels - you can do just the green chili or just the red pepper flakes. But if spice is not an issue I would recommend adding both. once you have mixed the sauces, add the tofu and mix to coat them well with the sauce mixture being careful as to not break the tofu pieces. Let it cook for 2-3 minutes and turn of the heat. Garnish with fresh cilantro and serve with boiled or fried rice.

If you don't think you have enough gravy, add a little more sauce but not too much. It is always a good idea to taste before you add more.

bon appetit !!!

Tuesday, September 7, 2010

Banana Bread


There is something very comforting about baking your own bread and when that's a banana bread, it bumps it up a few notches. What I love the most about this is how it fills my home with this wonderful smell - the wait seems way too long. I have tried a few recipes for this over the years with small variations and finally settled on one that I want to blog about :) 

This is probably one of my most frequently made snack simply because I always have a lot of bananas at home and hate to see it go to waste. You should make sure not to make the bread if your bananas have turned black - that will make it bitter.

I love banana bread for a lot of reasons - it can be served for breakfast, or as a snack for tea/coffee, or serve it with some ice cream for dessert - the bread itself is not overly sweet. Endless possibilities are always attractive. It also reminds me of an authentic Indian sweet dish called 'appam' that's part of the Kerala cuisine. The texture is different but the tastes are pretty similar. I personally like the bread plain, but I do add walnuts sometimes for a change. 

Even if you are not into baking but do like bananas, do try this one out.


Ingredients:

banana - 4 medium sized
2 cups all-purpose flour
2 eggs, beaten
1 cup sugar
11/2 tsp baking powder
1/2 tsp baking soda
pinch of ground cinnamon
1/4 tsp salt
1/4 tsp ground nutmeg
1/2 cup butter, melted
1/4 cup walnuts, chopped

Directions:

Preheat oven to 350 degree F. Grease the bottom and sides of a loaf pan (9x5x3 inch) and set aside. In a large bowl, mash the bananas and combine butter, egg and sugar into it. Now add the baking powder, baking soda, salt, ground cinnamon and nutmeg and mix well. Add the flour to the mixture little at a time until it is moistened - it will be lumpy. Once all the flour has been combined with the mixture, fold in the walnuts.
Pour the batter into the prepared loaf pan and bake for 60 minutes in the preheated oven. Insert a toothpick into the center and check if it comes out clean.
Cool in pan for about 10-15 minutes. Remove from pan and cool completely. 

bon appetit !!!

Tuesday, August 17, 2010

Carrabba's Tastemaker Event


3400 N. Central Expressway
Plano, TX 75074
(972) 516-9900
Josh Goldschmidt, Proprietor


This past Saturday we were invited to attend a Tastemaker Event at Carrabba's Italian Grill located on Central Expressway in Plano, as part of the Foodbuzz Tastemaker Program. This was my first event as a Foodbuzz publisher and I must say that I am looking forward to many more to come. It was a wonderful platform to meet with other fellow food bloggers and foodies and not to mention all that delicious food.


Founded in Houston by Johnny Carrabba and Damian Mandola in 1986, Carrabba's Italian Grill is not just another Italian food chain out there. Many of their dishes are unique and based on family recipes handed over through generations. They have several locations all over the country - be sure to check them out if you haven't already.


When I got this invitation I was pretty excited because I had never been to Carrabba's before and I love Italian food. The event started off with a warm welcome by the proprietor, Josh Goldschmidt who then led us to the front of their kitchen where we were given a chef's demonstration of their signature pesto and pasta dish - "Penne Franco". All their pastas are made fresh and do not sit for more than 2 hours. While we were at it, along came their house special light and fruity blackberry Sangria - it was needless to say the best I have ever had so far. If and when you visit Carrabba's, which I strongly recommend, please do ask for their Sangria - guaranteed you will love it.


Afterwards we proceeded to our assigned seats marked by our individual personalized menu cards. The lunch was kick started by fresh baked bread with the dipping and their "Grilled Bruschette" topped with pesto, tomato, basil and cheese. It was a light and lovely start to what would be one of the best Italian food I have had in recent times.


Next up were the 'Zuppa'  - I went with the "Minestrone" and Ashish tried the "Sausage and Lentil Soup". We each sampled both and loved it. The soups were very hearty but light and makes you want to jump on to the next course which is precisely what we did. Of course there was a lot of foodie conversation around the table and the Sangria kept coming :)

For our entree course we got "Tag Pic Pac" (ain't that a fun name) - which is a Tagliarini pasta in a Picchi Pacchiu sauce with chicken, crushed tomatoes, garlic, olive oil and basil. Ashish got the "Pasta Carrabba" - which is a Fettuccine Alfredo with grilled chicken, sautéed mushrooms and peas. All the dishes were very unique and had a very homemade feel to them. Their food is made fresh and that actually reflects in their dishes. If you had an Italian heritage and your Italian grandmother made lunch in her cozy home in Italy - this is what you would get to eat.


We each also got our goodie bags of their bread, carrabba caesar salad, and their signature pasta "Penne Franco" - with Chicken, mushrooms, sun dried tomatoes, artichoke hearts and black olives, with ricotta salata. Along with it were a serving of their mini-desserts which was a "Chocolate Coconut Mousse". So the lunch that left us wanting to taste more of their dishes lead to a comfy dinner at home with more surprises.


The ambiance of the place plays well with their food. Pair that with the friendly staff and you have a winner. The experience of meeting other food bloggers under this setup was very enjoyable and we look forward to meeting them all again.

Thank you Carrabba's and Foodbuzz.

Monday, August 16, 2010

Rubies -- for a hot summer's day


I live in Texas and HOT doesn't begin to describe it. It can get well over 100 degree F for several days and stay that way just like now....for those of you who are right now thinking that's so 'eewww' - let me tell you that it has its advantages. More sun means more time to spend outdoors and more reasons to have ice cream or hit the pool or buy lots of sun dresses :)  I totally love love love the weather and the openness that is all Texas. All that you need is  sunscreen and a bottle of water -  a hat also helps :)  I am leaving you with a wonderful drink for one such day.

About a month back or two, we went to check out 'Taste of Dallas' - for those unfamiliar with it, its a flavor filled 3 day festival that showcases Dallas' top chefs and restaurants. I have been to 'Taste of Chicago' once before and totally enjoyed it. I wasn't overly impressed with Dallas though but that's mostly because of the layout and how much one had to walk around in the wonderful weather we have out here. But once I got to the food stalls, it was a totally different story. I sampled a lot of cuisines but what stuck with me was this totally refreshing drink that I had - It was called "Rubies in Coconut" served by The Asian Mint.

Found out that the rubies were actually water chestnuts covered with tapioca and served in sweet coconut milk. You have got to try this one - Its definitely a keeper. The coconut milk is just sweet enough and you wont believe what the water chestnuts do to this drink. Its crunchy and borrows some sweetness from the coconut milk.

Before you give up on this drink cos its got water chestnuts, give it a try. You will be surprised.


Ingredients:

1 small can water chestnuts
1/4 cup water
1/2 cup tapioca starch
1/3 cup sugar
red food coloring
1/4 cup coconut milk

Directions:

Chill the coconut milk in the refrigerator. Slice about 10-15 water chestnuts into cubes. Add about 6-7 drops of red food coloring and make sure the chestnuts are all covered. Drain the any excess water and coat them with tapioca starch. To get large rubies, spray the chestnuts with some water and roll them again in tapioca starch. You can repeat this process several times until you are satisfied with the size of the rubies. 

Boil a pot of water and drop the Rubies into it. Once they start floating up remove the Rubies using a strainer and place them in ice cold water in a bowl. 

combine 1/3 cup sugar with 1/4 water to make a syrup. you can either heat them up in a saucepan or just microwave it for about a minute in a bowl. Once the syrup has cooled down add it to the chilled coconut milk. Make sure the coconut milk is not too thick. Check for sweetness and accordingly add more or less of the sugar syrup. Drop the Rubies into the sweet coconut milk. Grab a good book or listen to some good music on the patio and step into paradise :)


This recipe yields about 2-4 servings.


bon appetit !!!

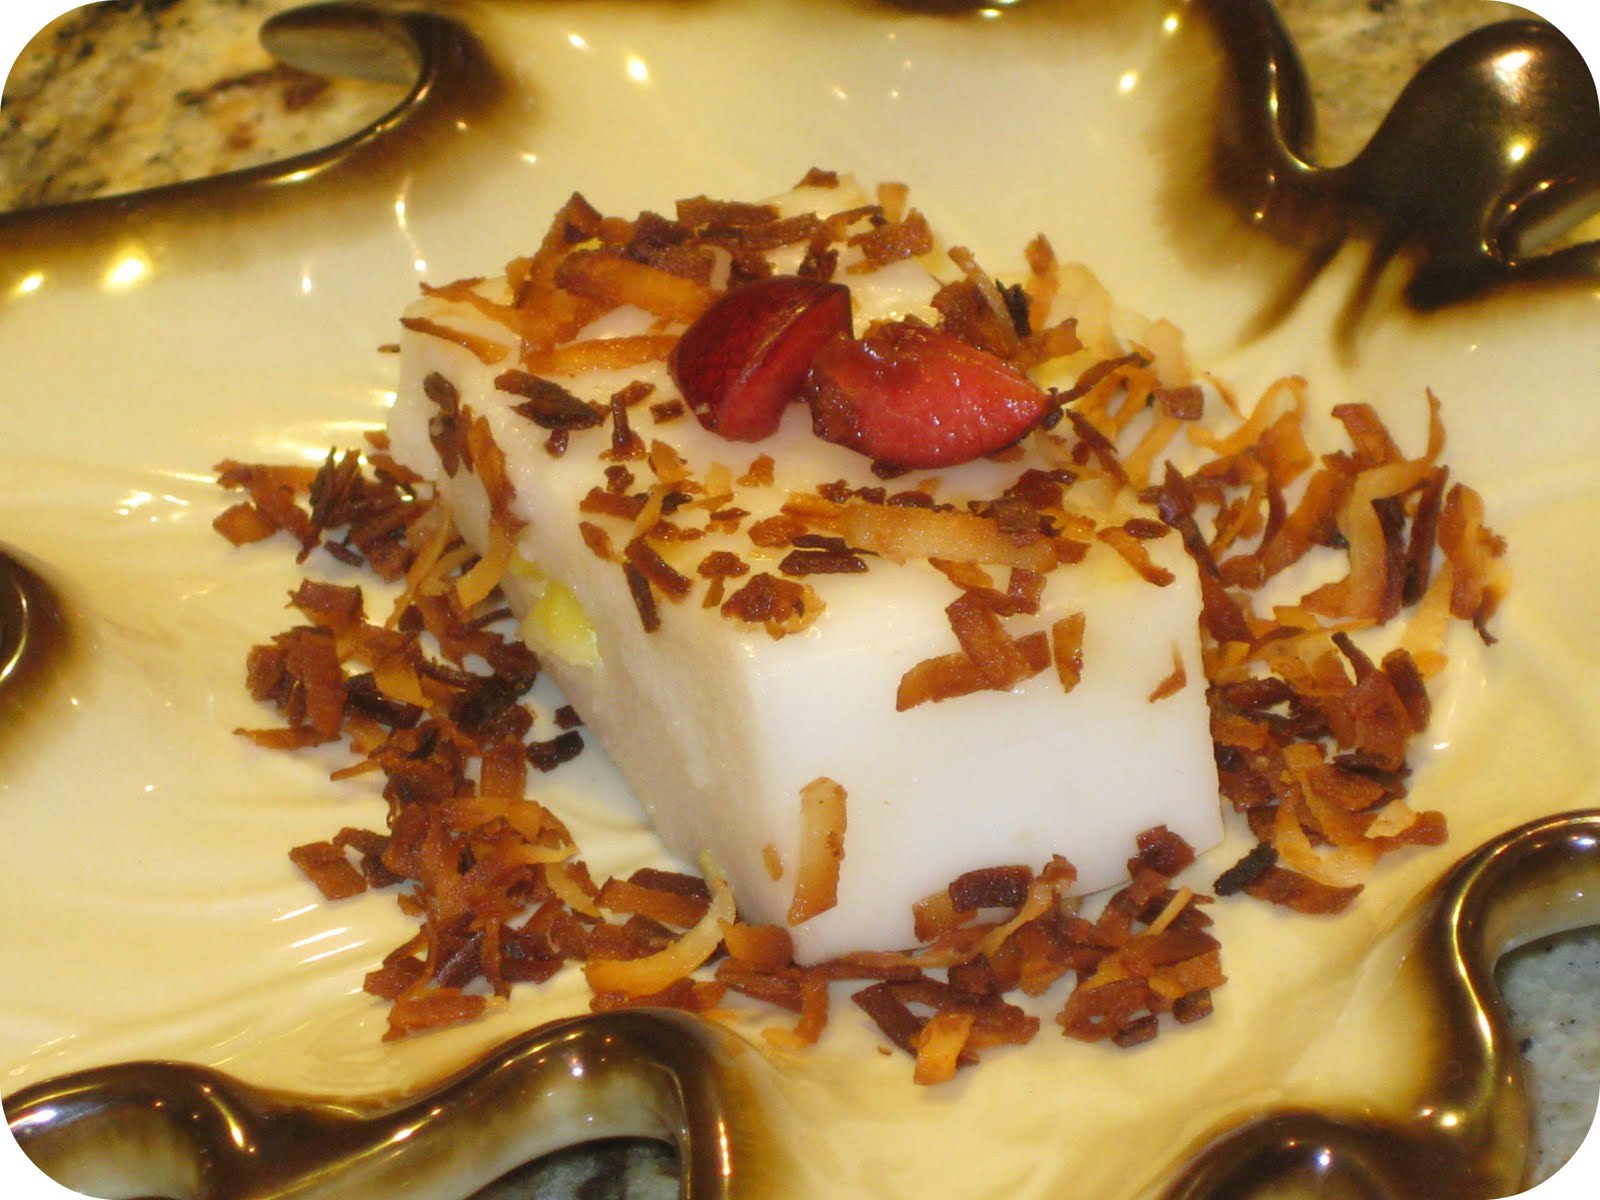
Cherry-Coconut Pudding


A while back I happened to chance upon a Filipino dessert that piqued my interest. Its called "Maja Blanca" and there are several different recipes and toppings out there for it. But its essentially a coconut pudding made with, well no prizes for guessing here...coconut milk. They also add corn kernels for added taste and texture. I was not too sure about how that would work, so I went looking for something that will give it an extra kick. It turned out to be my lucky day that I had fresh cherries sitting at home....don't you just love summers ??

Anyways my version of "Maja Blanca" is made with coconut milk, corn starch, sugar, corn kernels and fresh cherries. It was an interesting dish. I wouldn't say that I fell in love with it but at the same time..It kinda grows on you. I was glad that I added fresh cherries cos it gave it a tangy taste and the crunch factor. The pudding itself is very 'coconuty', smooth and very light. So the cherries inside the pudding and over it added a lot of flavor combined with toasted coconut on top. 


Ingredients:

1/2 cup water
1/4 cup cornstarch
1/2 cup coconut milk
1/4 cup white sugar
2 tablespoons fresh sweet corn kernels
2 tablespoons sweetened flaked coconut
1/4 fresh chopped cherries 


Directions:


Butter two 4 inch baking bowls, and set aside. Mix 1/4 cup of water along with the cornstarch and mix until smooth. Combine the coconut milk, remaining water, and sugar in a saucepan over low heat, and mix until the sugar dissolves. Bring the mixture to a boil, add the corn kernel and then add cornstarch mix and keep stirring. The coconut mixture will start to thicken. Keep stirring to avoid lumps. 

Once fully thickened - (you will know this as it will get relatively harder to stir the mixture), take it off the stove. Drop the chopped cherries into the mix - do not over mix it. Pour the coconut mix into the prepared bowls and set aside. Once cooled, set in the refrigerator until serving. Serve garnished with toasted coconut flakes and cherries.


This recipe makes about 4 servings, each serving about the size as in the last picture up here.


bon appetit !!!
Related Posts with Thumbnails